Earthquake Resistant Schools with Hollow Concrete Blocks
Updated: May 2015
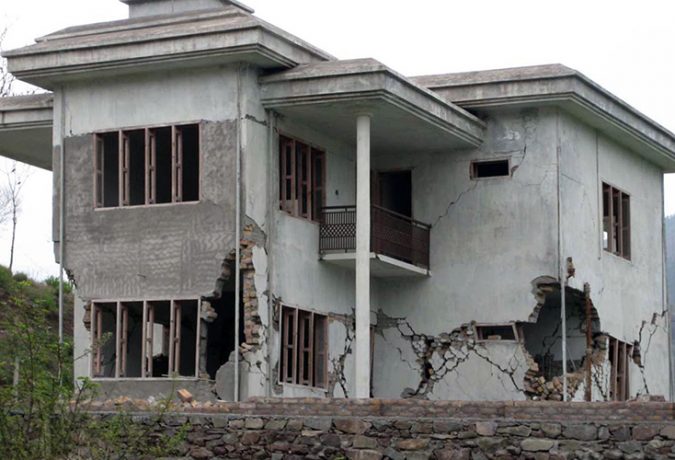
Between 2007 and 2012 Smart Shelter Foundation has built earthquake resistant schools and buildings in 20 villages in Nepal. All buildings have survived the recent earthquake without any significant damage. It proved that our buildings and techniques can withstand strong earthquakes.
Smart Shelter Foundation works in areas where the construction knowledge is low and material options are limited. We have calculated that adding the following steps to the design, makes your buildings roughly 20 to 30% more expensive. Meaning that for a reasonable extra investment, you can significantly reduce the risk of collapse during an earthquake.
On this page you can find a step-by-step tutorial of how to build earthquake resistant schools with hollow concrete blocks, according to the Nepali context. If you would like to receive this manual as a document please send us an email via the contact page, and let us know how and where you’re planning to use it.
Important note! Please keep in mind that it took us years of on-site presence to gain this knowledge and expertise. We always advise to seek proper technical assistance for such specific building related projects. It is possible that we make a design for you, for which we will ask a modest fee.
10 Rules of Thumb for single-storey buildings in Hollow Concrete Blocks
The following rules of thumb apply for buildings that only have a ground floor. All steps as described are also shown in the picture gallery below.
Picture credits and revision: Bothara, J. and Brzev, S.; Stone Masonry Tutorial, EERI World Housing Encyclopedia.
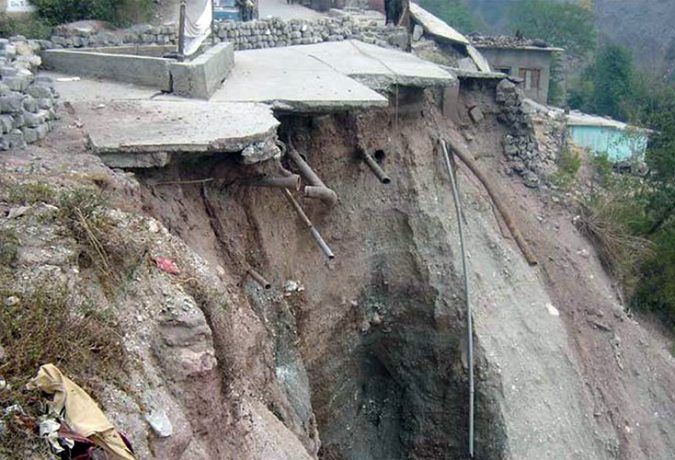 Rule 1. Do not build on slopes or in areas prone to landslides.
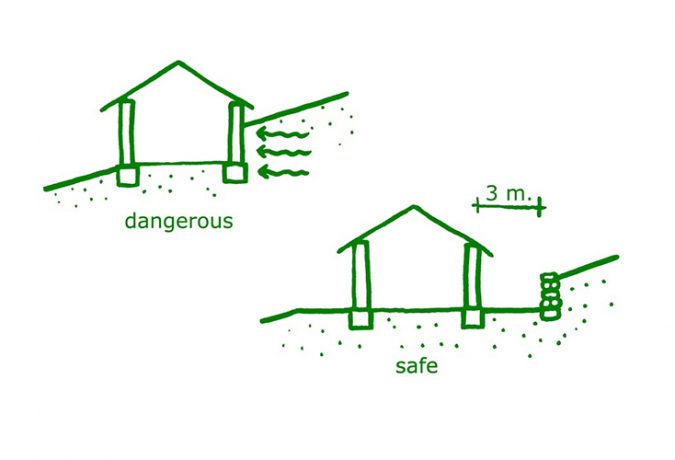
Rule 1. DON’T build directly on slopes.
- For building sites in hilly areas it is recommended to build at least 3 meters away from the slope. Alternatively, build a retaining wall to prevent a possible slope failure.
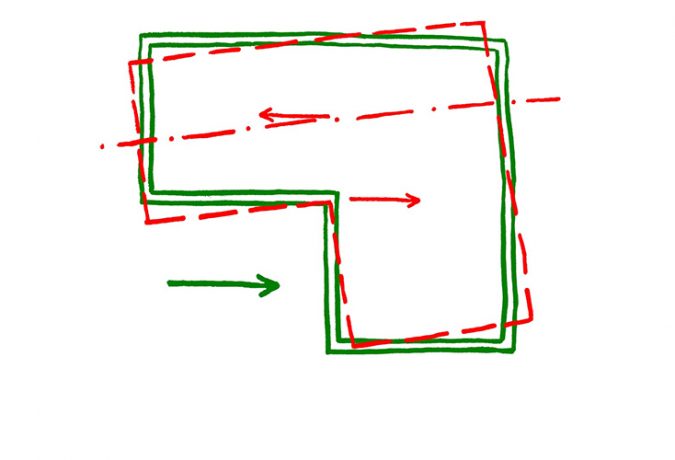
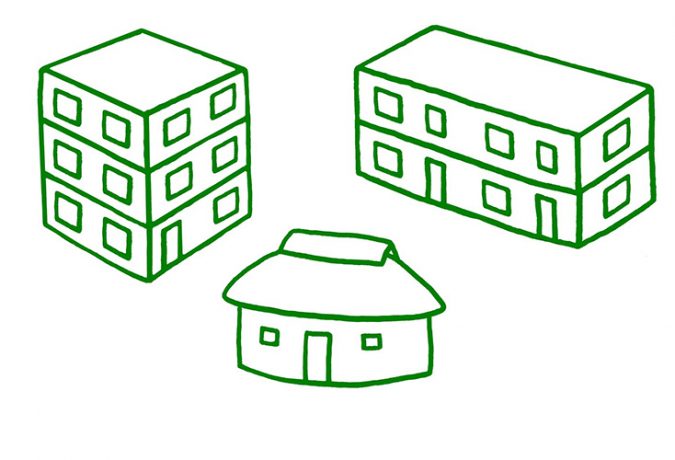
Rule 2. Use simple and symmetric plan shapes.
- DON’T make irregular plan shapes, such as L, H, T and U shapes. During an earthquake buildings with irregular shapes are likely to suffer more damage than similar buildings with regular shapes.
- DO make the plans regular; Squares, rectangles and circular plans are good shapes.
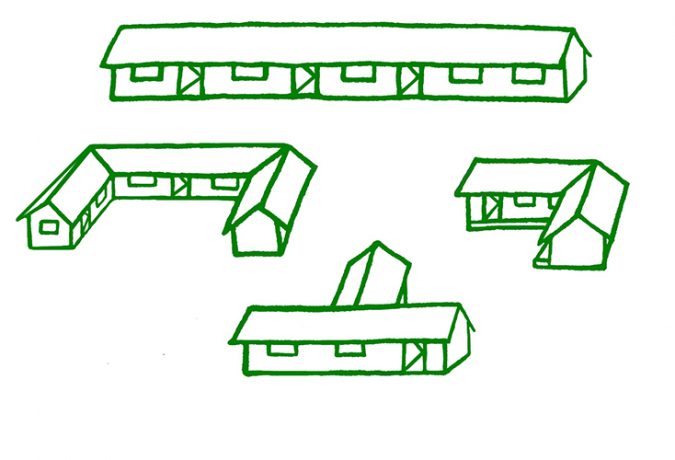
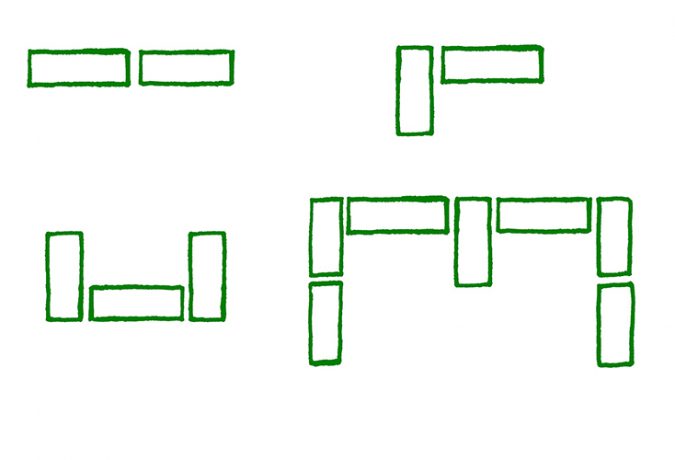
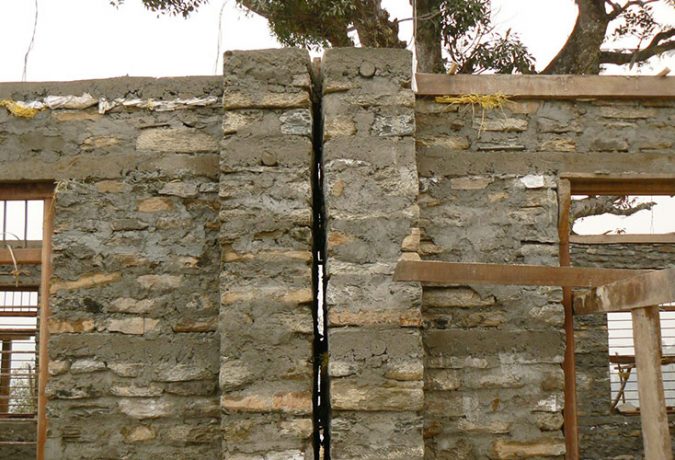
Rule 3. Divide the building volumes into separate blocks.
- Divide the building into smaller regular blocks with a gap of at least 3 to 4 inches. Another option is to create a corridor or walkway between the separate volumes.
- L, U and T shapes can be divided into rectangular blocks separated by gaps.
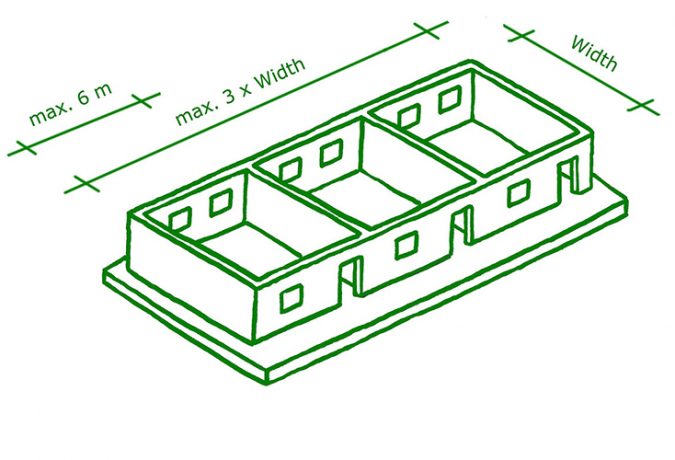
Rule 4. Maximum dimensions of the building.
- Maximum ratio of width versus length = 1 : 3.
- Maximum free span of rooms = 6 meters = 20 feet.
- Maximum wall height with rubble stone is 3 meters = 10 feet (ours are 2.5 meters high).
- Example. In Nepal, we make classrooms with a maximum length of 6 meters. That means that the maximum length of any building volume is 18 meters. So our maximum building size is 6 x 18 meters = 20 x 60 feet, and has 3 classrooms. If we make a school of 5 classrooms, we divide it in 2 volumes with a gap or corridor in between.
Rule 5. Foundation must be solid and have good bonding.
- Depths and widths of foundations depend largely on the soil consistency. This must be determined locally.
- DON’T use mud mortar for the foundations, as the mud may be washed out during the rainy seasons, thus weakening your foundation.
- We DO recommend cement mortar for the entire foundation, realizing that it is costly, but it gives you a good and strong foundation to build on.
- For building rubble stone foundations, sufficient bonding is a must, and you must include sufficient amounts of through-stones at the appropriate intervals.
- Through-stones are to be inserted at 3 feet (90 cm) horizontal and vertical spacing.
- Before applying the plinth beam, insert pieces of vertically standing rock in the wall below. This allows for better bonding between the wall and the horizontal reinforcement.
Rule 6. Include horizontal bands at several levels.
- Continuous bands act like a belt, keeping the walls together and making the building act as a whole. They are extremely important for good building performance during an earthquake. For exact dimensions, correct steel diameters and reinforcement connections, for both beams and stitches, always seek proper technical advice!
Rule 6a. Minimum of 4 beams for heavy earthquake zones:
- Plinth beam on top of the foundation.
- Sill beam beneath the windows (we are currently researching if we can position this beam differently!)
- Lintel beam above all doors and windows.
- Top beam on top of the walls.
Rule 6b. Horizontal stitches:
- At all corners and junctions between sill and lintel level.
- Note: we are currently researching the need and position of these stitches.
Rule 7a. DO provide vertical steel bars in the walls.
- Vertical steel bars are inserted at various point within the walls. These can easily be incorporated through the vertical holes in the concrete blocks.
- All vertical steel rods start in the plinth beam and end into the top beam. The bars are bent 2 feet (60 cm) inwards.
- The holes that have vertical steel inside need to be completely filled with a lean concrete mix.
- Steel bars are inserted at:
-3 bars at all corners
-4 bars at all t-sections
-1 bar at both sides of all doors and windows
-2 extra bars at all end walls and interior walls
Rule 7b. DO use cement mortar.
- We recommend to use cement mortar for the concrete block masonry.This extra strength is needed and improves the overall performance of your building.
- We used for our schools 1:6 cement:sand mix.
- Alternatively you can use 1:2:9 cement:lime:sand mortar.
Rule 8. Maximum dimensions of openings.
- The total length of door and window openings (b1+b2+b3) should not exceed 50% of wall length (between cross walls).
- Length of piers between openings (b4) should be minimum 60 cm = 2 feet.
- Length of piers at corners and T-sections (b5) are preferably minimum 90 cm = 3 feet.
- Very Important. Doors must open to the outside, so that exits cannot be blocked during an emergency.
Rule 9a. Connection between top beam and roof.
- It is best if you can find steel anchors that are cast into the beams. The trusses or roof beams then are bolted onto these anchors.
- As an alternative you can use galvanized steel wire. We tied long lengths of this wire around the horizontal steel rods, before casting the lintel beam. The wire is led through the walls and top beam. We then tightened the trusses securely with these lengths of steel wire that were sticking out.
Rule 9b. Light and rigid roofing system.
- For ground floor buildings, we prefer to make a gabled roof. DON’T build a heavy rubble stone gables.
- It is better to place trusses at the end walls and cover them with wooden planks. Provide ventilation openings to keep the building cooler.
- The trusses are inter-connected with cross-bracing to strengthen the roof system and to enable the roof will act as one element.
- We also make a ceiling in our classrooms. Together with all connected trusses, this makes the whole roofing system stronger.
- We discourage the use of a concrete slab roof. These are expensive, and generally the knowledge of making all proper connections and good quality concrete is not available.
Rule 10a. Correct use of materials, quality control and continuous supervision!
- Key rule! All buildings must be constructed using good quality materials and trained construction workers. This includes continuing training sessions and thorough supervision throughout the whole building process.
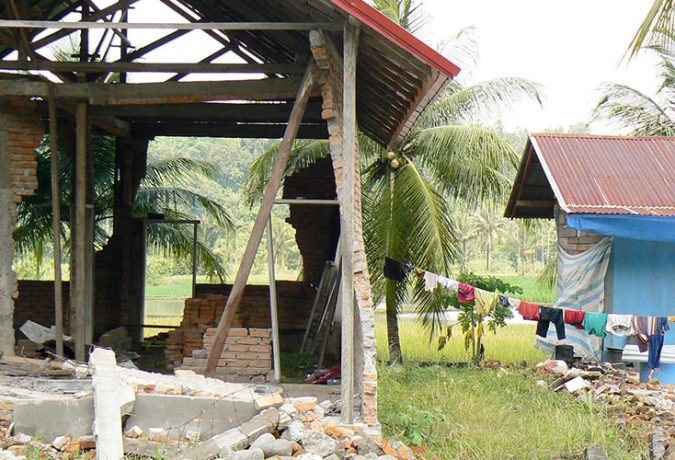
- Keep in mind that the buildings made of substandard construction materials and where shoddy construction practices were used are more likely to suffer significant earthquake damage.
- Please refer to our separate manual ‘Choosing the Right Materials and Quality Control for Non-Engineered Earthquake Resistant Construction’ regarding the proper use of materials, correct mixing of concrete and improving the overall construction quality.
Rule 10b. Full dedication and presence on-site. To make an earthquake resistant design is one thing. To make sure it is executed properly is something else. If the masons and carpenters do not how to build it, the structure may not be safe. Needed is:
- Extensive training and constant supervision on the building site.
- Include the recipients from day one, make them owners of their project and let them contribute to the realization.
- Find a dedicated and trustworthy local partner, who knows the area, understands the local customs and identifies the real needs.
- Do not reinvent the wheel and certainly do not guess and hope for the best. Find people that have the knowledge and experience with these specific ways of building.
Important note! Please keep in mind that it took us years of on-site presence to gain this knowledge and expertise. We always advise to seek proper technical assistance for such specific building related projects. It is possible that we make a design for you, for which we will ask a modest fee.
